Pay in installments of $6.07 with
![]() ,
,
![]() and
and
![]()
Shipping Estimate
USA
- USA
- CAN
- USA
- CAN
Ships within 48 hours · Estimated delivery Jun 29 - Jul 4
For Your Every Summer RSVP, with Code: SUMMER15
Description
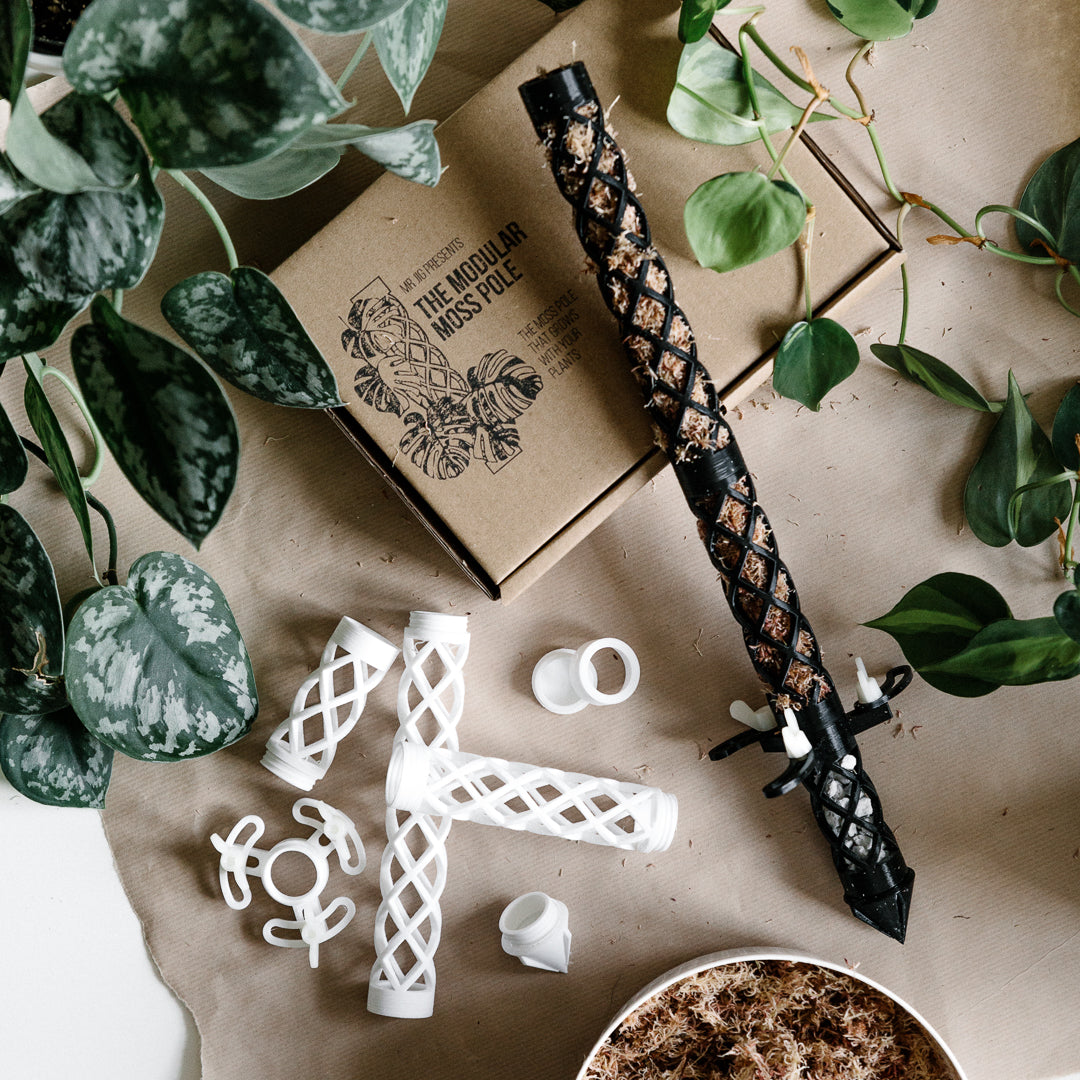
3d printed moss pole 3D Printed Moss Poles – Soil NinjaSoil. Ninja are proud to announce our partnership with 3D printing master Mr. Jig and bring your our first set of exclusive products. The Modular Moss Pole is 3D printed and includes several modular components to allow for customisation. These moss poles are made from PLA (Polylactic acid) which is primarily derived from corn starch. We now offer the 3D Printed Moss Poles in 2 kit sizes, the Original and the Starter. The Original kit includes poles,
Soil.Ninja are proud to announce our partnership with 3D printing master Mr. Jig and bring your our first set of exclusive products.
The Modular Moss Pole is 3D printed and includes several modular components to allow for customisation. These moss poles are made from PLA (Polylactic acid) which is primarily derived from corn starch.
We now offer the 3D Printed Moss Poles in 2 kit sizes, the Original and the Starter.
The Original kit includes poles, cap, base, brace and soil spike.
• Large Pole Sizes: 3x 190mm poles (50mm diameter)
• Small Pole Sizes: 3x poles, 75mm, 125mm and 175mm (25mm diameter)
The Starter kit includes a pole, spike and cap, great as an intro to the 3D Printed Moss Poles with room to grow using our Extension Kits
• Large Starter Kit: 1x 190mm pole (50mm diameter)
• Small Starter Kit: 1x 175mm pole (25mm diameter)
*Moss is not included in these sets, must be bought separately*
See diagram images for more information.
-
Cap - This screws on the top most pole to cover the exposed thread (for aesthetics)
Base - Screws into the bottom most segment to stop moss or over substrate from falling out of the bottom
Brace - This is the first mounting piece and has arms that can be expanded to fit your pot. Place the brace within an empty pot and expand the arms against the inside face and screw tight. This makes the pole very stable. As it has 3 arms the brace does not need to sit centrally and can be placed asymmetrically. Fill around the pole and brace with your preferred soil/substrate and add your plant. Attach the poles as required.
Soil Spike - If you are not ready to repot and therefore the brace can't be used, the soil spike can be screwed to the bottom of the pole and stuck into the soil. CAUTION - the point of the spike is sharp, keep away from eyes, sensitive areas and children.
For optimum height and pole stability the ideal setup would be to use the brace buried in a pot. One pole screwed below the brace with the base filled with loose stone, this will be the counter weight but will allow drainage, the rest of the poles and any extra poles are screwed above and filled with moss or your preferred substrate. The cap is screwed on the end until ready to expand.
-
Cautions:
- The soil spike is sharp, be very careful
- Some loose lines can be seen around some of the screw threads, pull these off with fingers or tweezers gently.
- When screwing parts together the first time screwing together could be a little stiff, tease it gently unscrewing a little before going again.
- When screwing poles together, hold the parts close to the ends which are being attached together, this will avoid strain on the helix which could cause the pole to snap.
- Extreme weight can cause the pole to snap. Please be mindful of what you are attaching to the poles.
Shipping Notes
- Free Standard Shipping on $100+ Orders to the USA.
- Except Preorder products are shipped in 48 hours.
- Delivery to the USA:
- Standard Shipping : 3-10 business days
- If time is of the essence, please consider selecting expedited delivery for faster service.
Exchange/Return Notes
- We offer a 30-day return/exchange service after receiving.
- Final sale items are not eligible for returns or exchanges.
- To process your return/exchange, please contact us at [email protected]
- Please click here for more details>>> Return & Exchange Policy